How to Design and Build a Stone or Brick Patio
Posted: December 30, 2015
|
|
There’s nothing more rewarding than getting your hands dirty, investing your time, energy and sweat into creating something of your own. Designing and building a brick or stone patio is an excellent project that will reap benefits year after year. If you’re considering taking on this project, here is some practical, step-by-step advice to help ensure that the end result is a resounding success!
 Step 1 – Choose Your Location
There are a lot of factors that go into choosing a location for a brick or stone patio. First and foremost, you’ll want to select an area that’s large enough to suit your needs. You’ll also want to pick a spot that’s convenient. After all, you’ll want to get as much use out of the area as possible once the project’s complete. Plan the shape and size of the area so you’ll know how much materials you’ll need for the next step.
Some other important factors to take into consideration when choosing a location include:
Step 1 – Choose Your Location
There are a lot of factors that go into choosing a location for a brick or stone patio. First and foremost, you’ll want to select an area that’s large enough to suit your needs. You’ll also want to pick a spot that’s convenient. After all, you’ll want to get as much use out of the area as possible once the project’s complete. Plan the shape and size of the area so you’ll know how much materials you’ll need for the next step.
Some other important factors to take into consideration when choosing a location include:
 Step 2 – Pick Your Materials
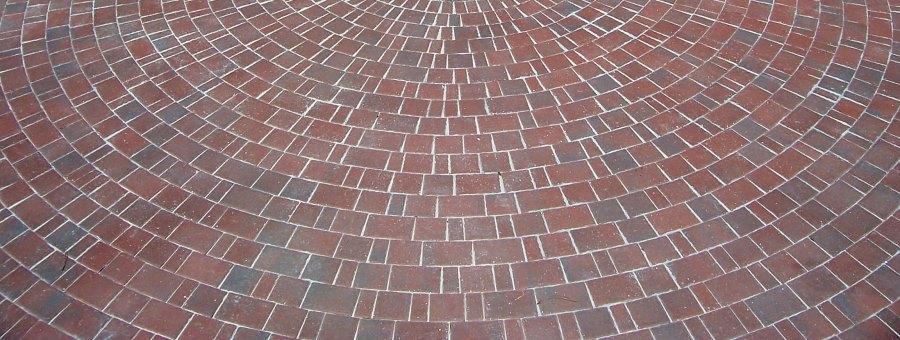
There are lots of options available to you in terms of the type of materials you’ll use to build out your new patio. There is the option of stone, which can vary greatly in texture and color. Depending on your preference, you can pretty much choose any type of stone that’s relatively flat. There are also different types of stone available in different geographical areas, so do some research and call around for pricing.
For a more economical approach, concrete pavers (otherwise known as bricks) are a nice choice. Like stone, these come in a variety of sizes and colors, so you’ll have your pick. Some kinds of pavers may be available for purchase at your local home supply store, while others may be available only through a local mason or brick laying company.
In either case, it’s a good rule of thumb to order approximately 15-20% more than what your measured space calls for. This allows you a greater selection of size and shape when you’re actually laying out the pieces. You also won’t have to worry about having to order more in the event that you happen to make a mistake in the process.
You’ll also need to order materials for the foundation of your patio, including landscape fabric and either gravel or sand. This will hold the stone or brick in place and also allow adequate drainage. Which type and how much you’ll need will depend on your soil quality. You may want to consult with a landscaping professional for this step to ensure you order the appropriate things.
Step 2 – Pick Your Materials
There are lots of options available to you in terms of the type of materials you’ll use to build out your new patio. There is the option of stone, which can vary greatly in texture and color. Depending on your preference, you can pretty much choose any type of stone that’s relatively flat. There are also different types of stone available in different geographical areas, so do some research and call around for pricing.
For a more economical approach, concrete pavers (otherwise known as bricks) are a nice choice. Like stone, these come in a variety of sizes and colors, so you’ll have your pick. Some kinds of pavers may be available for purchase at your local home supply store, while others may be available only through a local mason or brick laying company.
In either case, it’s a good rule of thumb to order approximately 15-20% more than what your measured space calls for. This allows you a greater selection of size and shape when you’re actually laying out the pieces. You also won’t have to worry about having to order more in the event that you happen to make a mistake in the process.
You’ll also need to order materials for the foundation of your patio, including landscape fabric and either gravel or sand. This will hold the stone or brick in place and also allow adequate drainage. Which type and how much you’ll need will depend on your soil quality. You may want to consult with a landscaping professional for this step to ensure you order the appropriate things.
 Step 3 – Mark the Patio and Start Digging
Now comes the fun part. Outline the perimeter of the patio and any adjoining paths using marking paint. The depth of digging required will depend on how high or low you want the patio to be when completed. If you’d like the area to be flush with the rest of your yard, you’ll probably need to dig down at least 10 inches. Alternatively, a raised patio is also an option. Once the digging is complete, roll out the landscape fabric.
Step 4 – Pour Foundation and Set Stones
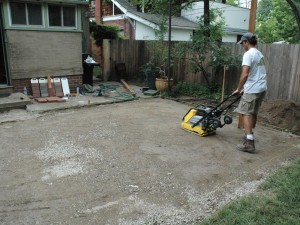
Start by assembling the stones or bricks in the border surrounding the patio. You may find you need to adjust the amount of sand or gravel to achieve your desired height. Spread the stones out to find the ones that fit together best. Leave no more than a 1 inch gap in between each one. Once all laid out, go over the area with a compactor to even it out and create a more level surface.
Spread sand or gravel over the stones and sweep it in between to set them in place. To secure the perimeter, place landscape fabric all around the edge and cover with soil, pressing firmly against the stone border.
If you’re using bricks instead of stone, piecing the patio together will be a little bit easier since the materials you’re working with will be more linear. The process is mostly the same, however, regardless of which type of patio you prefer.
Step 3 – Mark the Patio and Start Digging
Now comes the fun part. Outline the perimeter of the patio and any adjoining paths using marking paint. The depth of digging required will depend on how high or low you want the patio to be when completed. If you’d like the area to be flush with the rest of your yard, you’ll probably need to dig down at least 10 inches. Alternatively, a raised patio is also an option. Once the digging is complete, roll out the landscape fabric.
Step 4 – Pour Foundation and Set Stones
Start by assembling the stones or bricks in the border surrounding the patio. You may find you need to adjust the amount of sand or gravel to achieve your desired height. Spread the stones out to find the ones that fit together best. Leave no more than a 1 inch gap in between each one. Once all laid out, go over the area with a compactor to even it out and create a more level surface.
Spread sand or gravel over the stones and sweep it in between to set them in place. To secure the perimeter, place landscape fabric all around the edge and cover with soil, pressing firmly against the stone border.
If you’re using bricks instead of stone, piecing the patio together will be a little bit easier since the materials you’re working with will be more linear. The process is mostly the same, however, regardless of which type of patio you prefer.
 Step 5 – Decorate Your New Patio
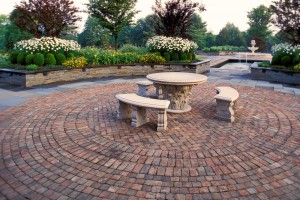
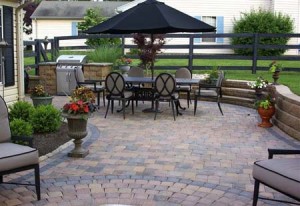
Now comes the fun part! You’ve done all the hard work of designing, measuring, digging and putting together your new patio. It’s time to start prettying up your new space and pulling the look together. There are the obvious things, like tables and chairs, which will allow you to entertain guests or just enjoy the great outdoors on a quiet evening with your family.
But considering all the blood, sweat and tears you sacrificed to get this project completed, why not go all the way and turn your new patio area into a total outdoor oasis? There are plenty of options (just look up patio designs on Pinterest for a few hundred ideas), including backyard cabanas, lounges, water fountains, and outdoor fireplaces.
If you live in an area that features a particularly hot climate, a misting system can provide you and your guests the cooling relief you need to enjoy the fruits of your labor, regardless of what the thermometer reads. The possibilities are virtually endless!
Building a patio can be a great DIY project for the right person. The steps above, combined with expert advice from a landscaping professional, can help ensure that the outcome is just the way you imagined. Need help accessorizing your outdoor space? Give us a call today. And, as always…stay cool, my friends.
Step 5 – Decorate Your New Patio
Now comes the fun part! You’ve done all the hard work of designing, measuring, digging and putting together your new patio. It’s time to start prettying up your new space and pulling the look together. There are the obvious things, like tables and chairs, which will allow you to entertain guests or just enjoy the great outdoors on a quiet evening with your family.
But considering all the blood, sweat and tears you sacrificed to get this project completed, why not go all the way and turn your new patio area into a total outdoor oasis? There are plenty of options (just look up patio designs on Pinterest for a few hundred ideas), including backyard cabanas, lounges, water fountains, and outdoor fireplaces.
If you live in an area that features a particularly hot climate, a misting system can provide you and your guests the cooling relief you need to enjoy the fruits of your labor, regardless of what the thermometer reads. The possibilities are virtually endless!
Building a patio can be a great DIY project for the right person. The steps above, combined with expert advice from a landscaping professional, can help ensure that the outcome is just the way you imagined. Need help accessorizing your outdoor space? Give us a call today. And, as always…stay cool, my friends.
Step 1 – Choose Your Location
There are a lot of factors that go into choosing a location for a brick or stone patio. First and foremost, you’ll want to select an area that’s large enough to suit your needs. You’ll also want to pick a spot that’s convenient. After all, you’ll want to get as much use out of the area as possible once the project’s complete. Plan the shape and size of the area so you’ll know how much materials you’ll need for the next step.
Some other important factors to take into consideration when choosing a location include:
- Slope – Unless you’d like to also build a retaining wall, stick with spots that have no more than ¼ inch slope per square foot.
- Drainage – Spots that are too low could become a big problem when it rains. Keep this in mind.
- Digging Issues – Consider things like slate, tree roots, pipes and underground wires when you’re looking for the perfect patio spot. All of these could cause a huge headache when it comes time to dig.
- Shade – How much shade are you comfortable with? If you’d like the option of sun, you may want to choose an open location and instead use patio umbrellas or shade sails to control the amount of shelter you have.
Step 2 – Pick Your Materials
There are lots of options available to you in terms of the type of materials you’ll use to build out your new patio. There is the option of stone, which can vary greatly in texture and color. Depending on your preference, you can pretty much choose any type of stone that’s relatively flat. There are also different types of stone available in different geographical areas, so do some research and call around for pricing.
For a more economical approach, concrete pavers (otherwise known as bricks) are a nice choice. Like stone, these come in a variety of sizes and colors, so you’ll have your pick. Some kinds of pavers may be available for purchase at your local home supply store, while others may be available only through a local mason or brick laying company.
In either case, it’s a good rule of thumb to order approximately 15-20% more than what your measured space calls for. This allows you a greater selection of size and shape when you’re actually laying out the pieces. You also won’t have to worry about having to order more in the event that you happen to make a mistake in the process.
You’ll also need to order materials for the foundation of your patio, including landscape fabric and either gravel or sand. This will hold the stone or brick in place and also allow adequate drainage. Which type and how much you’ll need will depend on your soil quality. You may want to consult with a landscaping professional for this step to ensure you order the appropriate things.
Step 3 – Mark the Patio and Start Digging
Now comes the fun part. Outline the perimeter of the patio and any adjoining paths using marking paint. The depth of digging required will depend on how high or low you want the patio to be when completed. If you’d like the area to be flush with the rest of your yard, you’ll probably need to dig down at least 10 inches. Alternatively, a raised patio is also an option. Once the digging is complete, roll out the landscape fabric.
Step 4 – Pour Foundation and Set Stones
Start by assembling the stones or bricks in the border surrounding the patio. You may find you need to adjust the amount of sand or gravel to achieve your desired height. Spread the stones out to find the ones that fit together best. Leave no more than a 1 inch gap in between each one. Once all laid out, go over the area with a compactor to even it out and create a more level surface.
Spread sand or gravel over the stones and sweep it in between to set them in place. To secure the perimeter, place landscape fabric all around the edge and cover with soil, pressing firmly against the stone border.
If you’re using bricks instead of stone, piecing the patio together will be a little bit easier since the materials you’re working with will be more linear. The process is mostly the same, however, regardless of which type of patio you prefer.
Step 5 – Decorate Your New Patio
Now comes the fun part! You’ve done all the hard work of designing, measuring, digging and putting together your new patio. It’s time to start prettying up your new space and pulling the look together. There are the obvious things, like tables and chairs, which will allow you to entertain guests or just enjoy the great outdoors on a quiet evening with your family.
But considering all the blood, sweat and tears you sacrificed to get this project completed, why not go all the way and turn your new patio area into a total outdoor oasis? There are plenty of options (just look up patio designs on Pinterest for a few hundred ideas), including backyard cabanas, lounges, water fountains, and outdoor fireplaces.
If you live in an area that features a particularly hot climate, a misting system can provide you and your guests the cooling relief you need to enjoy the fruits of your labor, regardless of what the thermometer reads. The possibilities are virtually endless!
Building a patio can be a great DIY project for the right person. The steps above, combined with expert advice from a landscaping professional, can help ensure that the outcome is just the way you imagined. Need help accessorizing your outdoor space? Give us a call today. And, as always…stay cool, my friends.