How to Install a Misting Fan
For some areas, summer is winding down, but for others there’s no relief in sight. If you’re still battling those dog days of summer and have decided to invest in a misting fan to help bring relief from the heat and humidity, you’ll want to install your new product as soon as possible. Here is a simple, step by step guide, for getting your misting fan ready to go so you can enjoy the coming weeks in cool, refreshing relaxation.
Choose your location. Keep in mind that the filter must be placed in a location that is flat, dry and protected from the elements. It must also be close to an outlet that can handle 120 GFI and a water source (either a spigot or within reach of a high quality hose).
Set up your filter. Install the filter bracket onto the wall in your chosen location. Assemble your filter following the instructions provided, making sure to include the time release anti-scale cartridge. Once assembled, attach the canister to the mounted bracket. Attach the hoses to the canister.
Prepare fan location. The next step is determining the exact spot above where the filter is located that you’d like to mount your fan. The ideal height is typically somewhere around 8-9 feet, angled down at 30-40 degrees and 6-15 feet from where you and your guests will likely be spending your time. Prepare the area where you’ll be placing your fan using the appropriate hardware.
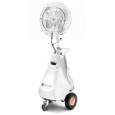
Attach nozzles to fan. Locate the standard 1 ¼ inch hole in the center of the fan guard. This is where the nozzle of your misting system will go. Unscrew the back of the nozzle assembly and insert it into the fan guard. Pull the assembly through and then turn it in a clock-wise direction until it fits snugly against the fan.
Mount fan to wall or ceiling. Attach the fan to the desired location. Keep in mind that you will need an adequate GFI power source. Or, if you prefer, you can have the area hard-wired by a licensed electrician.
Test your fan. Double check your fan to ensure that it has power and adjust the positioning so that it is aimed in the direction where you want the mist to go.
Attach tubing to the nozzle assemblies. Cut tubing to size, being careful to make all cuts perpendicular (angled cuts could result in leaking). Attach one end of the tub into the “Out” lock on the pump. Snap the pressure release valve into the tubing. Place a lock tee on the tubing above each fan, aiming it directly toward the nozzle entry, and attach it to the wall using a tube clamp. All tubing should be clamped approximately every 24-30 inches, with elbow clamps for going around corners and tees for running tubes in different directions.
Cut a 3 foot piece of tubing and insert it into the center of the tee. Run the tube over the fan and attach it to the front edge using a small zip tie. Remove excess tubing and snap into the nozzle assembly. Before connecting the final nozzle, turn on your water just half a turn and start the pump. Remember, the pump should never be run without a water supply, as this could burn out the motor. Allow the water and pump to run for about a minute or so to get dust and air bubbles out of the lines. Turn both off, wipe the tube to remove excess moisture and insert the tubing into the nozzle.
Once the tube is properly inserted into the nozzle, start the water and pump again. Don’t be alarmed if the pressure relief valve spurts a bit for a few seconds – that just means the pressure is building. The mist should start momentarily. If you notice a leak in one of the fittings, simply push the tubing into the slip lock more firmly to create a better seal.
Sit back and enjoy!
As you can see, installing a misting fan isn’t really that difficult. For more detailed instructions, click here or call us at 800-504-6478. We’d be more than happy to walk you through the process so you can begin enjoying your outdoor space in cool comfort as soon as possible.
Good luck, and as always….stay cool, my friends!